How to Remove Background Objects in Snapseed
How to Remove Background Objects in Snapseed: For mobile users, Snapseed serves as one of the most modern, feature-rich and powerful photo editing applications available. Removing unwanted objects in Snapseed can significantly enhance the quality and attention of your images. In this article, we will cover the Snapseed basics, and all the way to advanced techniques, best practices, and Snapseed limitations to help you hone your skills in background removal.
Digitally Changing the Background of Pictures
Though Snapseed lacks full-layer masking and advanced Photoshop backgrounds, its ‘Healing’ tool works best for the removal of smaller and moderately sized background and other objects.
This tool works best for minor edits to cover blemishes, small distractions, and objects that scatter across the image, especially when the unwanted object has a simple and clean background, like the sky, grass, or a wall.
Step-By-Step Directions
It’s free for all and Snapseed even has a guide on how to use the Healing to Tool to remove background distractions from images. Below are the steps to using the tool.
Add a Photo to Snapseed
Launch Snapseed and tap on “Open”. Choose the photo you want to edit.
Go to the Tool Menu
On the bottom panel, tap on “Tools” and find “Healing” in the list.
Zoom In More and More
Zoom in on the area as precisely as possible which increases accuracy on the precisely targeted area.
Sketch Over the Object
You will use a stylus or a finger to carefully remove the item. The longer the object the longer the stroke, the smaller the object the shorter the stoke.
You Snap and Blend
Once your finger’s lifted Snapseed, will sample the area and try to blend it. You can undo using the back arrow if it doesn’t look real and try from a different area and redo it.
Adjust as Needed
You will have to work on the area a couple of times to form a perfect match, are perfect as possible.
Save and Apply
You can click the edit sign and on the side there is an option that says “save.” This is how you can export the image after being satisfied with the outcome of your editing.
For Better Results
Removing backgrounds with Snapseed can be tricky, so here are some pro tips that may help you.
Pro Tips for Better Results
To maximize the effectiveness of background removal in Snapseed, we recommend the following pro tips:
- Source Points: When healing an area, try to pull the healing points from the edges of the area and work your way in for the best results.
- Take your time: Instead of trying to remove a large object in one go, it is easier to break the object into smaller segments and fix one piece at a time.
- Just as in the bigger strokes, shorter passes work best too. Instead of one long continuous stroke, multiple shorter strokes will allow Snapseed to seamlessly blend the edges.
- Make sure to use the Fade feature so that the edit is not solid or uniform.
- Stay Away from Complex Patterns: If you have the option, try to use a photo that has a solid backdrop. Complex patterns or gradients are much more difficult to blend.
- Keep Original Layer: Before any heavy alterations, it’s wise to duplicate the original image. This boast will enable unlimited reversions in the event your alterations are too drastic.
Also Read: Snapseed QR Code: How It Works and How to Use It
Limitations of Removing Background Objects
Snapseed, while powerful, is not without its flaws. Some of the limitations you should consider are as follows:}
Poor with Complicated Backgrounds
If there is a background with dense textures and intricate patterns, the dreaded healing artifacts might rear their ugly heads.
Difficulties with Appendages
Snapseed performs poorly on intricate details and highly complex objects due to the lack of advanced masking features.
Off Color Due to Capture
The retouched section can be too disjointed if sampled from an area with different coloring.
Mobile-Specific Constraints
Having to work with a small screen and lack of tools as desktop editors can impact precision.
The Undo Tool We Didn’t Ask For
There is a “dissolve” button, where you can move a whole section and undo the action instead of merging it. This causes less control over blending complex areas.
Techniques to Improve Background Removal
Snapseed may be a simple program, but it does help to know a few tricks for more accurate background removals. These advanced techniques will help with more “polished” editing.
- Combine Tools: After using the Healing tool, you can change to the Selective Tool to alter the brightness, contrast, and saturation in the targeted section. This helps the healed border to match better with the rest of the border.
- Use Double Export: You can export the image after the initial healing, then re-import it back into Snapseed for another editing pass. You can use this technique to improve parts of the image where full blending does not occur, or subtle clean-up is needed.
- Brush Tool Blend: Snapseed’s Brush Tool is quite helpful to touch up the the healed border with the background with gradients of color changes. The painting technique helps in subtle corrections.
- Use Other Photoshop Apps: Other mobile apps like Photoshop Express, TouchRetouch, and Enlight Photofox specialize in advanced content aware removal, then finalize the touch-ups in Snapseed.
Examples and Use Cases
Snapseed has become a powerful editing tool due to the versatility it offers. With Snapseed, removing background objects is more efficient and offers better results.
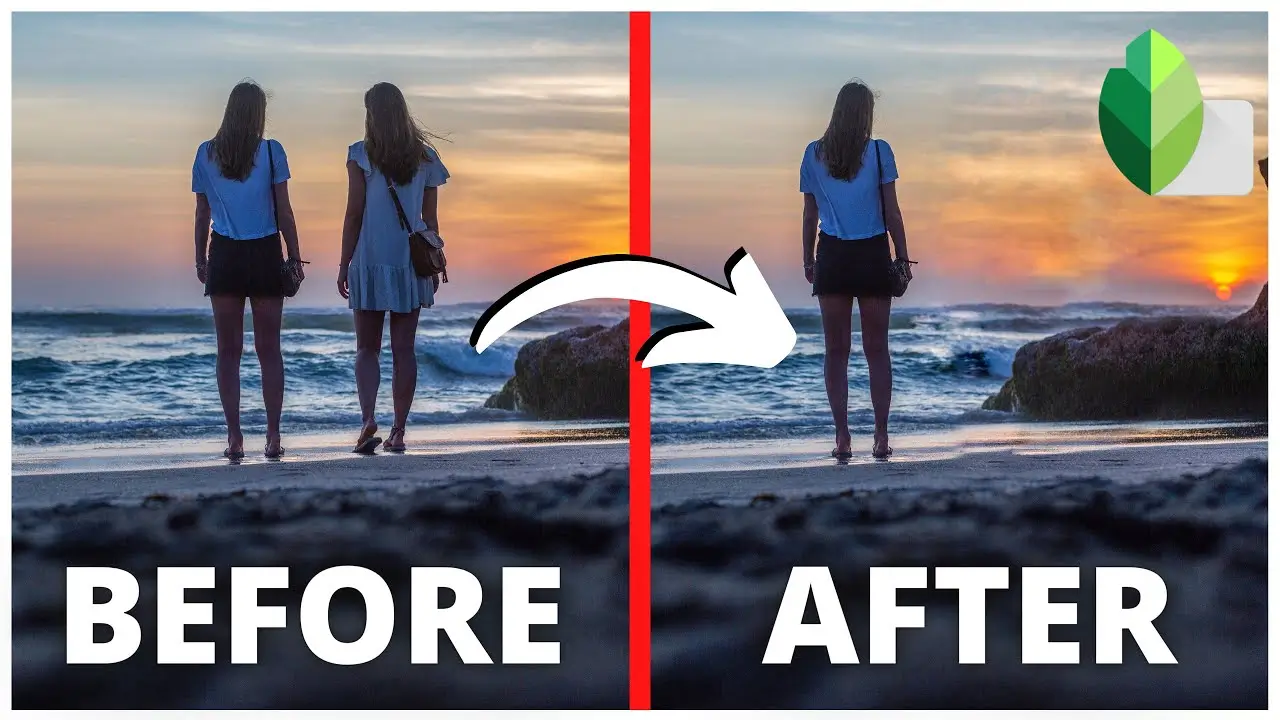
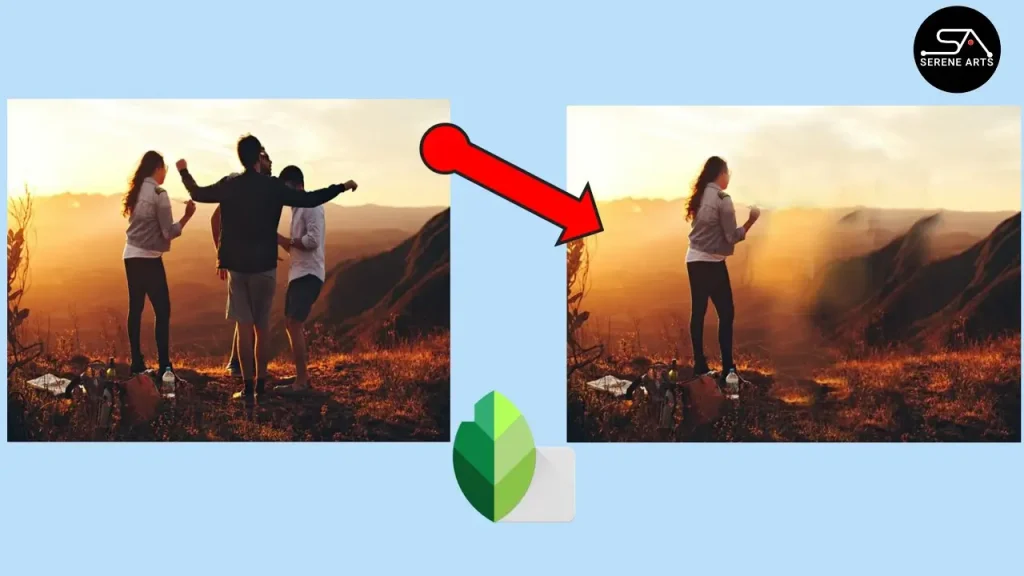
- Portrait Photography: It is also useful in portraits by eliminating stray trash and removing obstructions like photobombers in the background. This makes the image look better.
- Product photography: for small items (such as for jewelry and small gems), filling small gaps or reflections can add to the beauty of the product.
- Travel photos: Removing pieces of trash, unwanted signs, or people from travel pictures helps to better see the beauty of the landscape or the architecture.
- Social media content: Photos that are too busy and cluttered are less popular. Backgrounds are cleaned and simplified to help images perform better on Instagram, Pinterest, and other similar platforms.
Comparing Snapseed To Other Background Removal Tools
When deciding whether to stick with Snapseed or use alternative tools, it’s helpful to compare:
| Tool | Strengths | Limitations |
|---|---|---|
| Snapseed Healing | Free, mobile, quick, intuitive | Limited for large/complex backgrounds |
| TouchRetouch | Specialized removal, clone stamp, lasso | Paid, may require skill |
| Photoshop Express | More advanced retouching, layer support | Can be overwhelming, subscription-based |
| Desktop Photoshop/Lightroom | Highest control, masking, full editing | Requires computer, steep learning curve |
Final Thoughts
In the end, using Snapseed to take objects out of the background of pictures has proven to be much easier than anticipated. Through the use of the Healing tool, the careful stroking, fading, and knowing the limits of the fading tool’s effect allows for better photos.
You can only get these changes on mobile, without needing to migrate to desktop software. For people that wish to do difficult or subtle edits, like busy backgrounds or large objects, may use Snapseed with other mobile applications.
Cleansing travel images, improving portrait photos, or cleaning social media graphics? Whoever needs those tools should look right Snapseed for being simple, powerful, and free. If they practice and focus, they can turn their smartphone photos to pro.